You love your curls after a salon perm; unfortunately, it is expensive to keep up with your hairstyle. You don’t want to lose the body and bounce you get with a salon perm, but you can’t fit it into your budget.
If you can’t make it into the salon, you can give yourself a home perm. It’s easier than you may think and significantly less expensive. When your curls start to droop, here’s how to perm hair at home with household items.

You’ll Need a Few Items:
When you’re ready to give yourself a home perm, you’ll need a few items. Some you should have lying around, others you need to get from the store. Make sure you have the following on hand:
- Shampoo
- Comb
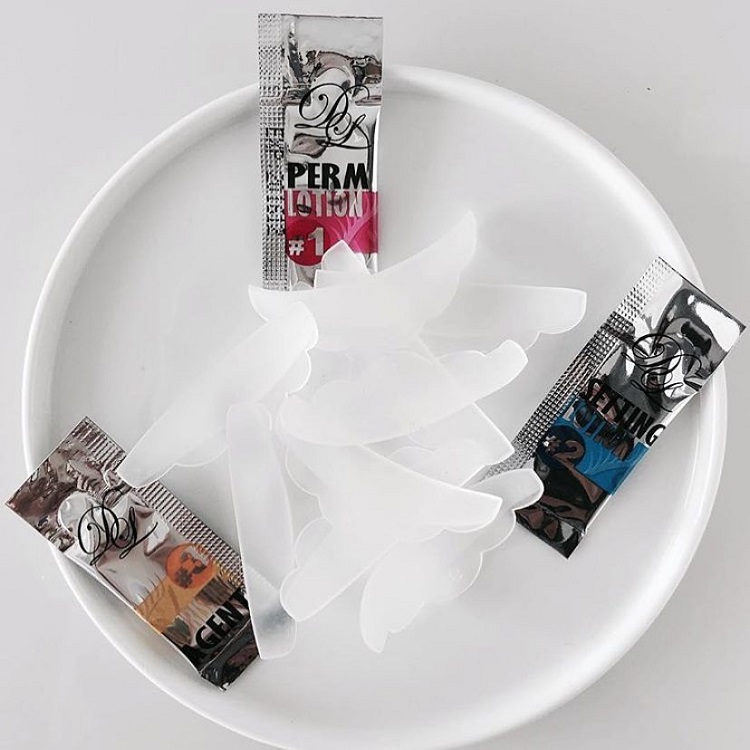
- Home perm kit
- Towels
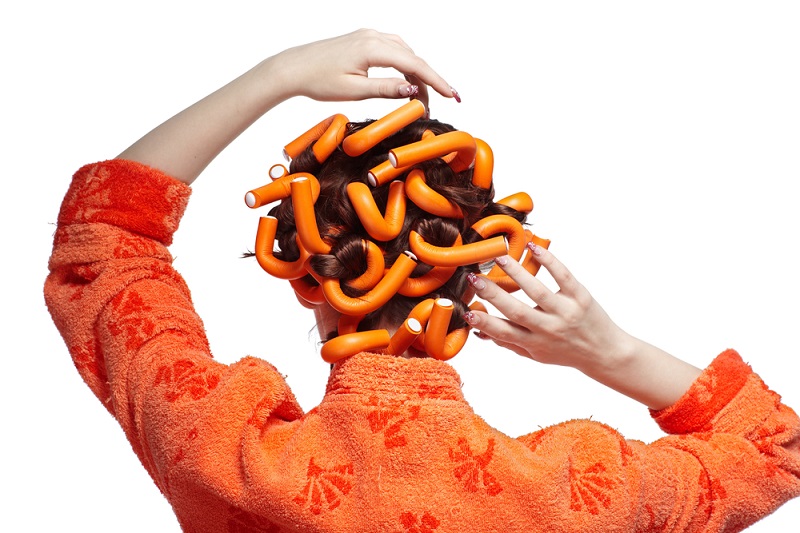
- Perm Rods or rags
- Eyedropper
- Plastic gloves
It is easier to use a home perming kit. The kits come with all of the chemicals premeasured, so all you have to do is combine them. You can also find inexpensive bags of rods. They are usually next to the perm kits.
Not everyone wants to put chemicals in their hair. If you’re one of those who prefer a natural approach, mix an all-natural perming solution in the kitchen. You only need the following three ingredients:
- 1/4 cup of flaxseed oil
- 1/4 cup aloe vera gel or juice
- 1 cup of water
Combine the ingredients in a saucepan and let it boil for around three minutes. Turn the burner off and get ready to put some bounce back into your curls.
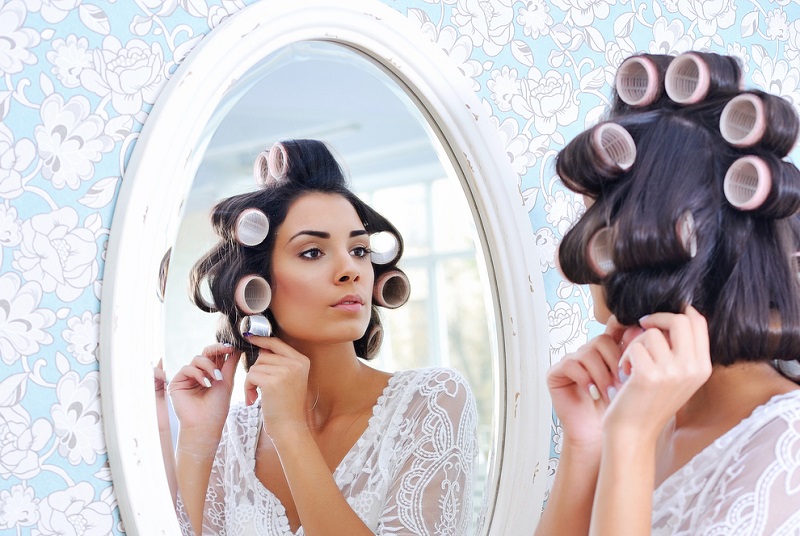
How to Perm Your Hair at Home
Once you have the perming solution mixed, you are ready to start on your hair. Before you start using the rollers, you want to wash your hair with your favorite shampoo. Getting rid of dirt and oil helps the perm to take better. It also prevents any potential interactions between the perming solution and hair oils.
After washing your hair, blot excess water with a clean towel and get ready to give yourself a home perm.
Divide Your Hair into Sections
The length and thickness of your hair, along with your style, determines how many sections you have to divide your hair into. Using the comb, separate your hair into sections that cover the rod without going over the edges. Repeat this process until all of your hair is wrapped around the rods.
Rod size determines how loose or tight the curls are. Smaller rods give you tighter curls, and you get looser ones with larger rollers.
Use Rags for Looser Curls
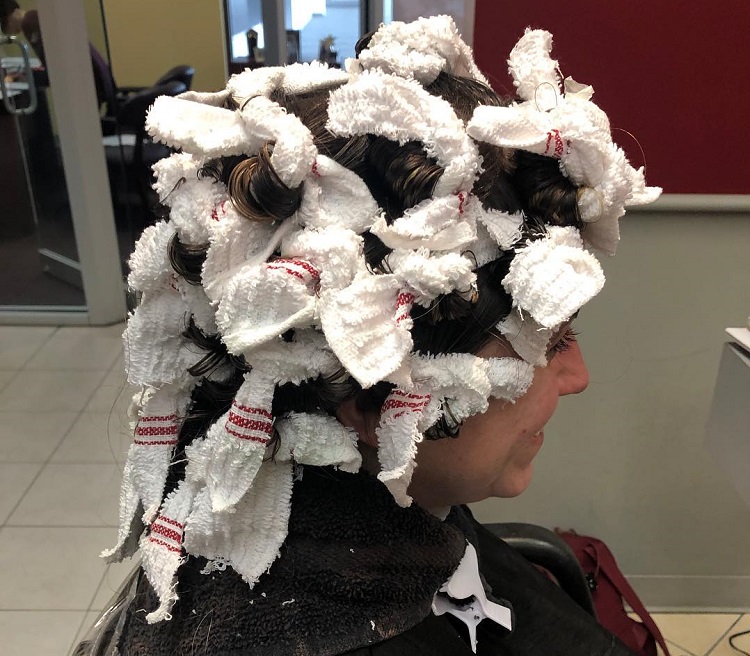
Another trick is to use rags. You get softer, looser curls and don’t have to spend money on a bag of rods. You can use an old bed sheet to make the rags. Cut it into 2’ x 6’ strips and place each section of your hair into the center of a strip.
Roll the strip up, keeping your hair flat. Don’t twist your hair in the rags. Your curls will have the same curled shape until your next perm.
Secure the rolled-up rags in place by tying the ends. You can also use bobby pins to hold the ends down.
It’s a good idea to practice with the rags before applying the perm solution. Leave the rags in as your hair dries, and carefully take them out. Keep practicing until you get the curls you want. Then it’s time to apply the solution.
Apply the Perm Solution
Wrap a towel around your neck. You don’t want to get the perming solution on your clothes or skin. It’s also time to put on the gloves. Thin plastic gloves work best. You can still feel your hair but have protection from the chemicals. Wear gloves with homemade perming solutions as well.
Fill an eye or similar dropper perm solution. Put a drop on each section of hair in a rod or rag. You don’t need to saturate your hair as a little of the solution goes a long way. When you’re finished applying the solution, cover your hair with a shower cap or towel.
Check Your Perm’s Progress
Let the solution sit on your hair for 10 or 15 minutes, depending on your hair’s thickness. To see if the perm is finished, unwrap one section of hair. If the curl is still s-shaped, reroll it and wait a couple more minutes.
Rinse and Dry Your Hair
Keeping the rods in, rinse your hair for several minutes. You want to get all of the solution out, but don’t use shampoo.
It’s easier and faster to use a blow dryer, but you can also use a towel to blot the rollers. If you use a hairdryer, keep it on a low setting. You want it to take a while for your hair to dry. It helps ensure the perm sets.
Remove the Rods
When your hair is dry, go ahead and take out the rollers or rags. Toss them in the sink or a bucket for easy cleaning later.
Rinse your hair again, and you still don’t want to use shampoo.
Related: Perm Rods Vs. Flexi Rods
Keeping Your Home Perm Looking Great
You want to avoid a few things after home perming your hair. Do not use shampoo or condition for a few days. It’s okay to rinse your hair, but you don’t want to add anything else for at least two days.
Don’t try to comb your curls out. You’ll end up with frizz. A hair pick will keep the snarls out as your curls continue to set. After a couple of days, you can go back to washing, conditioning, and styling your curls.
Wait at least two weeks after your home perm before you color your hair.
Learning how to perm hair at home with household items is easy. You can make the perming solution or pick up a box at the store. It only takes a couple of hours to give yourself a perm, and it is noticeably cheaper than a visit to the salon. With a little practice, you can get great-looking curls at home.